I like to be immersed in useful information, and often dreamed of ways to have it literally floating above me so that I could glance up and see something new and interesting.
A few years ago I mounted a 43" Fire TV above my desk, tie-wrapped a Raspberry Pi to the back of it, and used MagicMirror to create the display of my dreams. I have spent several years improving my display and am finally ready to tell you all about it!
MagicMirror is a mature piece of open source code with a very active community. The base package includes a default set of modules, and there are hundreds more available. Most of these modules were built by developers to “scratch their own itch”, and subsequently shared far and wide, also in open source form.
The original MagicMirror concept was based on mounting a monitor behind a piece of half-silvered glass so that the overall project looked like a mirror. While this is one way to use MagicMirror, there’s no reason that it can’t be displayed on a standard monitor. Here’s how mine looks:

To the right of my keyboard you can see an Elgato Stream Deck. In addition to controlling my video stream and my lights, my all-powerful Stream Deck controls my MagicMirror, allowing me to switch between pages with the touch of a button.
There are dozens of detailed guides that will help you to set up and configure a MagicMirror of your very own, but this is not one of them. Instead, I will spend most of my time sharing the unique details of my own ever-evolving setup.
One thing that I particularly loved about this project (aside from the result), was that I got to use a very wide range of skills, including learning how to use a stud finder to securely mount the TV, using the Linux command line (not a new skill, but one always worth exercising), setting up an effective source code control system, debugging JavaScript and Node, and more. If you don’t have any of these skills, don’t let that stop you from getting started!
Before I dive in, I want to point out that I spent months slowly evolving my MagicMirror into its present form, adding, configuring, re-configuring, removing, updating, and even modifying modules to suit my needs. I would advise you to start simple, and to move at your own pace in order to avoid getting overwhelmed. There’s a lot of power and a lot of flexibility here, but take it one step at a time.
I treated this as a software project from the very beginning. I wanted to be able to track my changes and to revert them if necessary, and I also want to make sure that I can easily upgrade to a newer and more powerful Pi in the future.
To do this, I used Amazon CodeCommit to set up my own Git repository. This is available as part of the AWS Free Tier, and I would have used it even if I was not an AWS employee.
I am not a Git expert, but I am able to do most of my work with relatively simple commands: git checkout, git add, git commit, and git push.
In addition to keeping the two main MagicMirror configuration files (config.js and custom.css) under source code control, I maintain a running README file that tracks my progress, also under Git control:

After re-reading this, I was reminded that I did my initial setup on an Amazon EC2 instance. This is an important point: MagicMirror is simply a program that runs on a Linux server, and need not be run on a Raspberry Pi.
Because I don’t set up fresh systems every day, I find that I need to keep track of all of the steps, and to confirm that they work each time that I use them. I used a Google Doc for this project. This document has 22 steps, and takes me from a raw Pi to one that has MagicMirror installed and running:

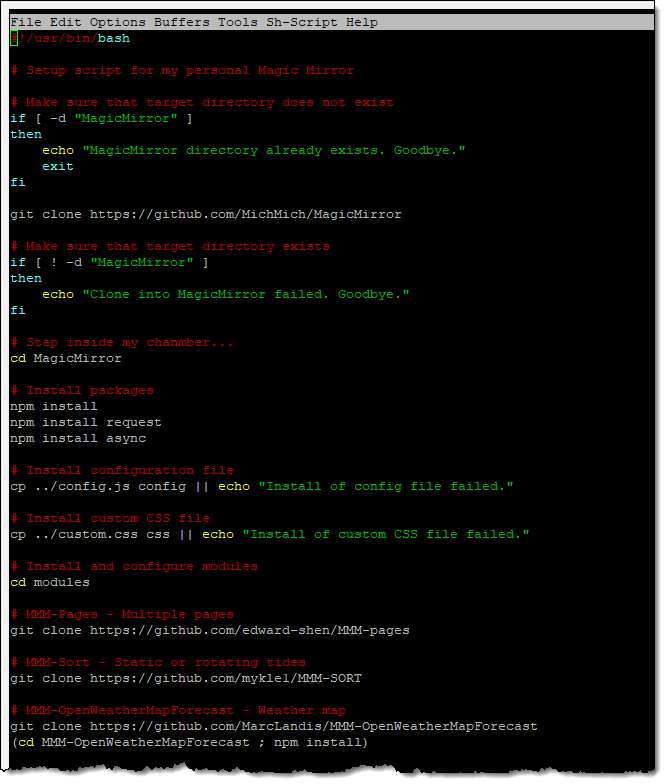
The setup process for my MagicMirror consists of a long series of git clone and npm install commands. In keeping with my goal of making the process fully repeatable and fully automated, I created a Bash script and use it to do all of the setup steps. It creates a directory and then does every last bit of preparatory work (this takes 20–40 minutes):

My directory setup looks like this:
Source/MagicMirror — This is what I checkout from my Git repo.
Source/MagicMirror/mm_setup.sh — The setup script.
Source/MagicMirror/config.js — The configuration file.
Source/MagicMirror/custom.css — The custom CSS file.
Source/MagicMirror/MagicMirror — This is a sub-repo that comes from github.com. It contains the actual MagicMirror code.
Source/MagicMirror/MagicMirror/modules — This is where all of the modules (each a separate sub-repo from github.com) live.
To launch MagicMirror, I log in and run this command:
Let’s take a look at each of the modules that I use to make my MagicMirror work. As noted earlier, I started simple and added to this over time, and you should do the same.
Before I dive into the visible modules, I need to tell you about an invisible one! MMM-Pages lets me have multiple pages, each composed of one or more modules. It has options to flip from page to page after a specified time interval, and I have also set up my Stream Deck to allow me to do the same on command.
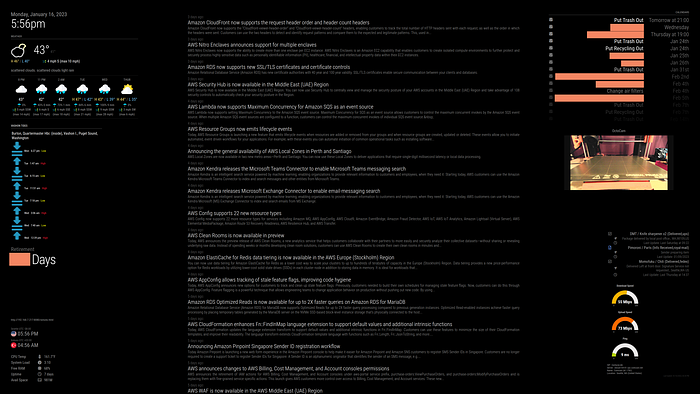
Here is my first page:

The left column uses the following modules:
The center column uses the newsfeed module to display the latest AWS news via an RSS feed.
And the right column uses these modules:
Here is the second page:

This page was the result of several experiments. It uses MMM-Webview to open an HTML page that resides on a Pi that is running PiAware. The page loads images from the Washington State Ferry cameras on the left, and the FlightAware map from the Pi on the right. My home is on the approach to Seattle-Tacoma International Airport; I sometimes hear a plane outside and can look up to see it moving across the map. Getting this page to work and to look nice took some time, but I really like it!
Here’s the HTML that I used:
Here is the third page. This one is brand new and I am having a lot of fun setting it up. The goal is to display all kinds of educational and informative infographics so that I can look up and learn something new:

This page uses MMM-WebView. This infographic is from the brand new AWS Fundamentals book, and is shared with their permission. The book contains 13 infographics, each one jam-packed with very useful info:

I am still building up my collection of infographics; here’s what I have so far, and your suggestions are welcome:
I still need to review and download these:
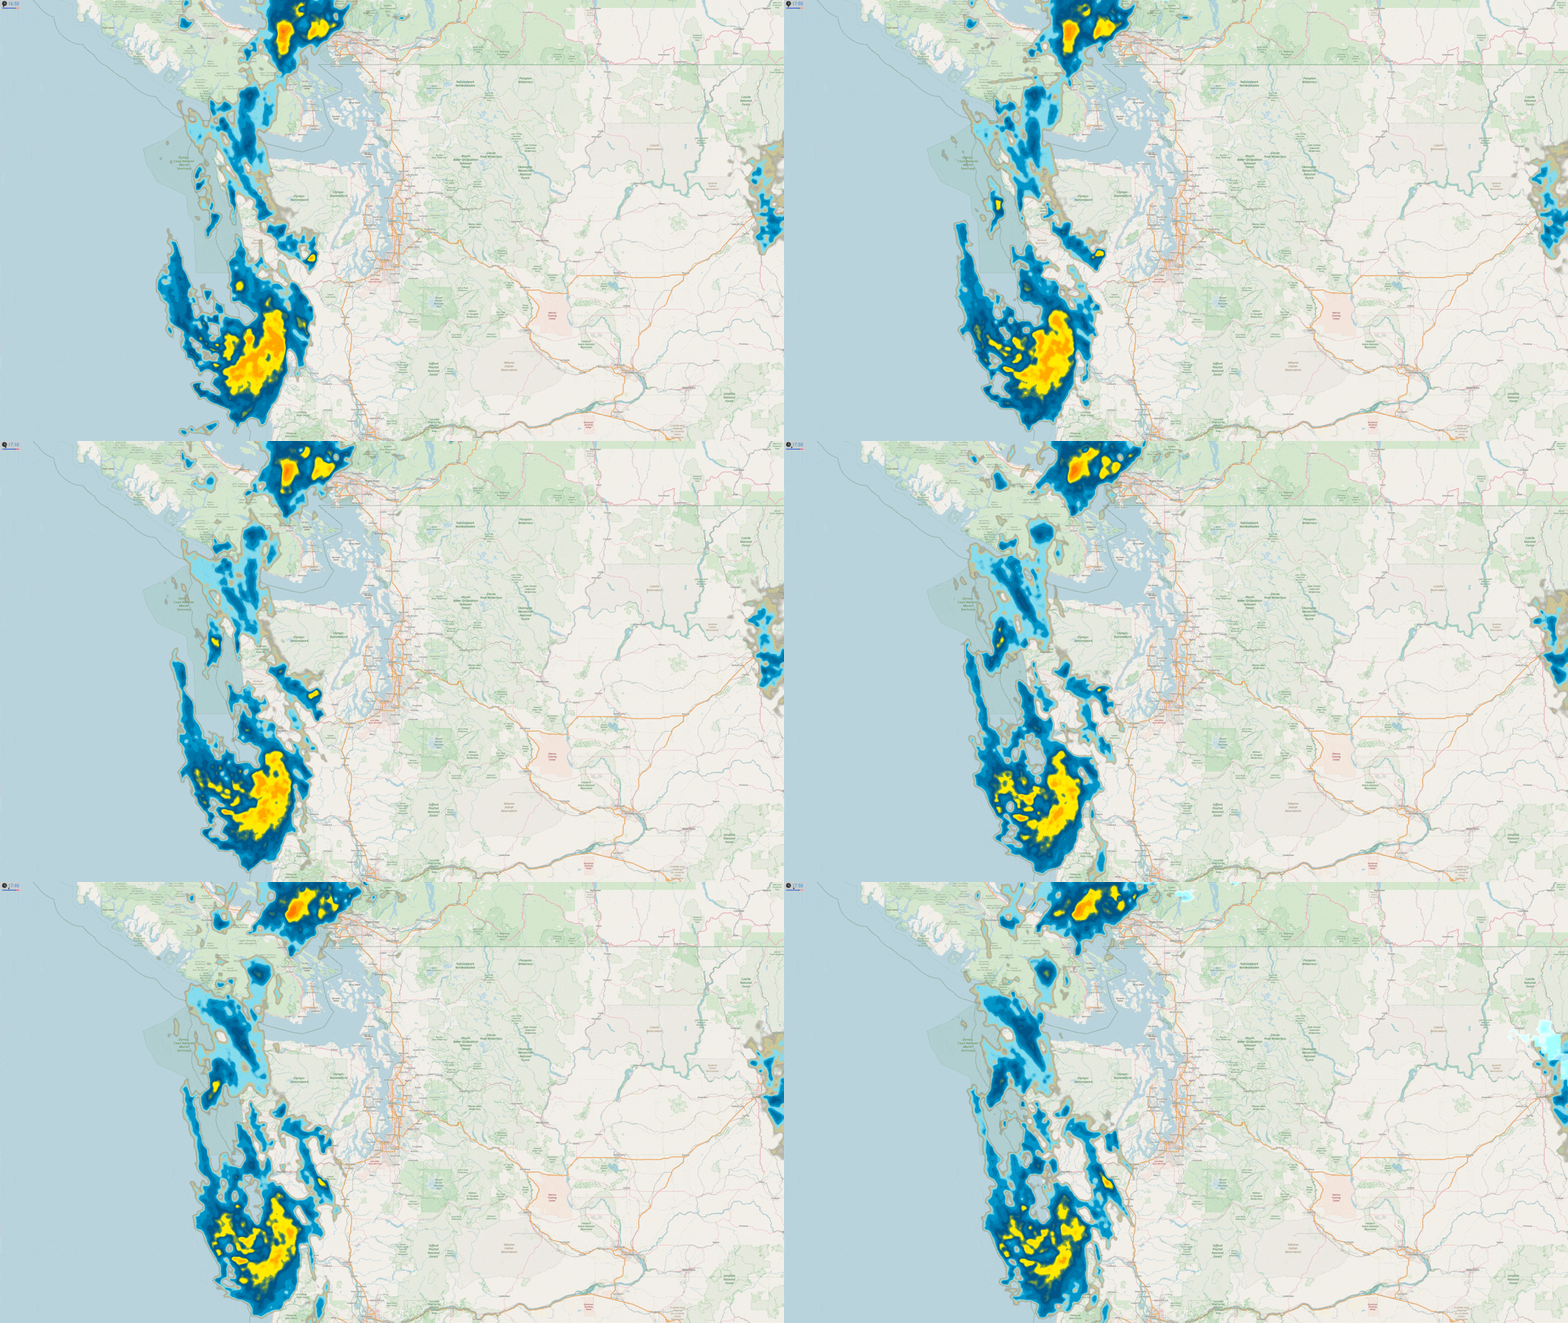
And here’s the fourth page (image created using ezgif.com):

This one uses MMM-RAIN-MAP and data from the RainViewer API to show historic and forecasted rain in my area.
And that’s what I have so far, with more to come when I can get my hands on a Pi 4B with more memory and compute power.
There’s also a fifth page, but it is not in the timed rotation. With a press of a key on my Stream Deck, I can see my calendar in full-page form, courtesy of MMM-MonthlyCalendar (personal items have been covered with blue bars):

Be aware that each of the modules that I mentioned was built by a well-intentioned developer that might or might not still be able to maintain and enhance it.
Over the years modules might fall into disrepair, and another maintainer might or might not step forward. If you find that a module is broken and no longer maintained, check the forks and see if you can find a fork that fixes the issue. Or, better yet, fix the bug and file a pull request.
Depending on your use case and the degree of repeatability that you want, you might want to create personal forks of each module and then clone those into your project. If you do this you will need to update your copies from time to time.
There’s one more module that you need to know about. MMM-RemoteControl . If you are using MMM-Pages, you must configure the remote control as a fixed page:
MMM-RemoteControl implements a REST API that lets me control my MagicMirror from my Stream Deck. The config file includes an apiKey to protect against (local) mischief:
XYZ is not my actual key, of course!
The Stream Deck is configured to make an asynchronous HTTP GET request when I press a key; the 6 keys in the bottom left are set up in this way:

For example, the Home key makes this request:
Each module responds to a specific set of notifications. These are generally documented, but you might need to dig through the source code from time to time.
Here’s my attempt at showing how the information flows from various external sources and into my MagicMirror (created with Dendron and Mermaid):

And there you have it! I am very happy with the current configuration, but I will continue to look for and experiment with new modules.
As I noted earlier, I got to use a large number of disparate skills in the course of setting up my MagicMirror. As is often the case with these projects, acquiring new skills and improving current ones is an unavoidable positive side effect.
Build one yourself, and let me know how it goes!